Personal Concept Map:
Instructions:
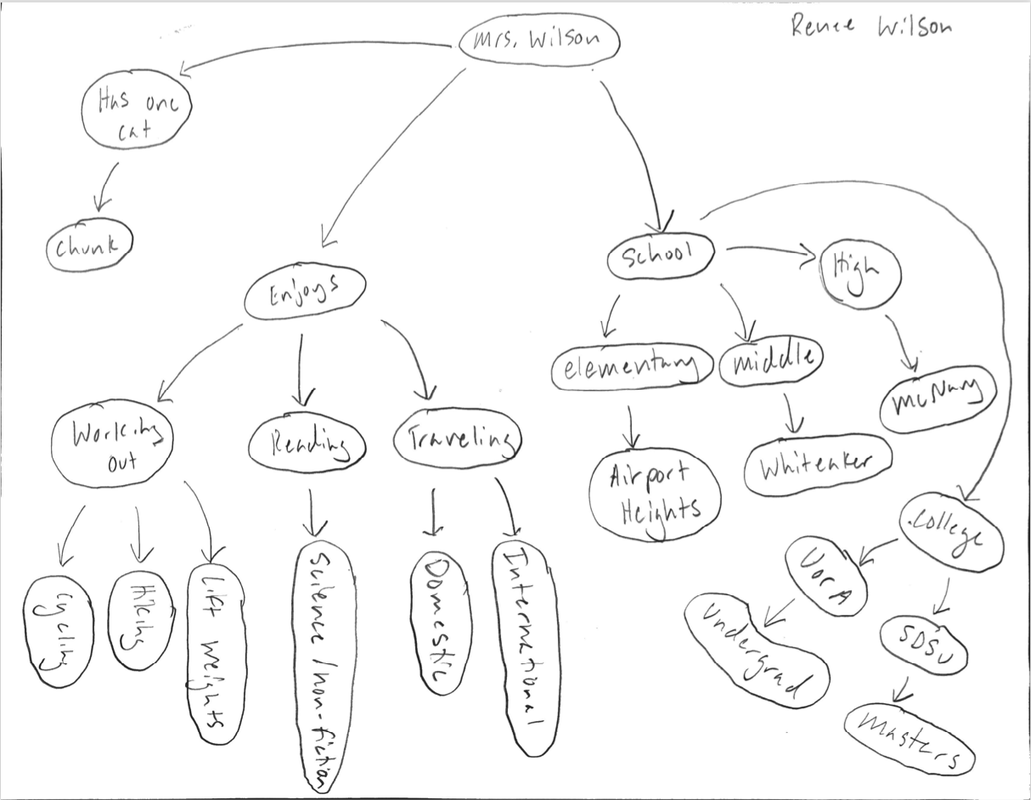
1. See below for an example of what you'll be creating on yourself. Be sure your personal concept map:
Instructions:
1. See below for an example of what you'll be creating on yourself. Be sure your personal concept map:
- Stems off your name on three different topics (e.g. education, hobbies, and pets) and stems even further on some.
- Includes at least 20 bubbles.
2.
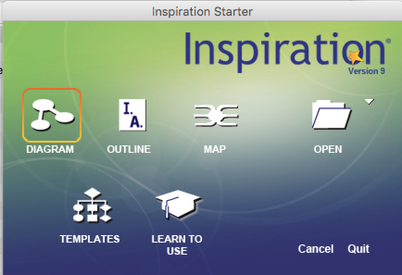
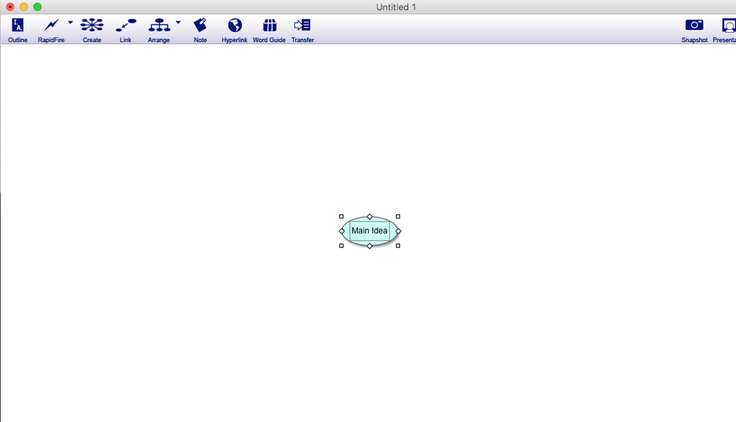
4. The screen below will appear. You can delete "main idea" in the circle and write your name (first and last). Once finished writing name, click somewhere outside of the circle to begin adding to your concept map.
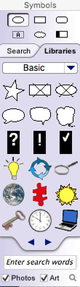
5. Click the circle symbol in the top left corner on this box shown below to add more circles to your diagram. You can use the mouse to drag the circles where you want them to be on the page.
6. To connect the circles, click on the circle where you want the arrow to start, then click on the link symbol shown below. After that drag the arrow to the desired circle and click inside the circle. If you want to write text (aka connecting words) in between the arrow, click on the box within the arrow and write the text.

7. Once you finish creating your personal concept map, convert into a file (e.g. pdf, snap shot using snipping tool, or copy and pasted into a word document). I do not want google docs/lucid chart links submitted. If using Inspiration, it may be easiest for you to take a snap shot using the snipping tool. I will not accept pictures taken with the camera on your phone.
8. Go to google classroom and upload your file on the personal concept assignment tab. Once again, NO google doc/lucid chart links accepted.
8. Go to google classroom and upload your file on the personal concept assignment tab. Once again, NO google doc/lucid chart links accepted.
